|
This
set of pictures shows how I made the shifter cable set up. I
took the TH-125 shift arm and installed it on the 4T60E but did
not like the angle of the arm when installed, so I ended up
using the 4T60E arm but turned 180 degrees from the stock donor
car position. The stock TH125 Fiero shifter arm is 1 5/8" from
the center of the stud to the ball link. On the 4T60E, when I
went through the gear detents and at this distance the ball
moved 3/8" between the gears. This distance is shown by the
small hole I drilled in the shift arm. When I checked the
distance the shift cable moved between gears with the shifter,
the cable moved 1/4". I then checked the shift detents on the
TH125 tranny and the ball also moved 1/4" between gears. I had
to find where to put the ball on the 4T60E arm to get the 1/4"
ball movement between gears. This distance ended up being 1 3/8"
from the stud center to the ball.
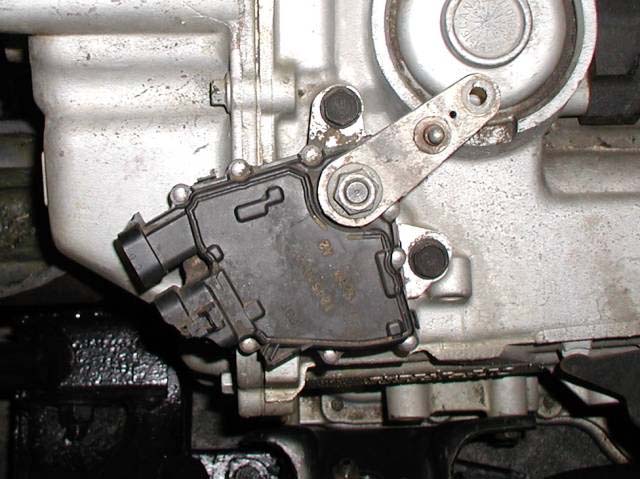
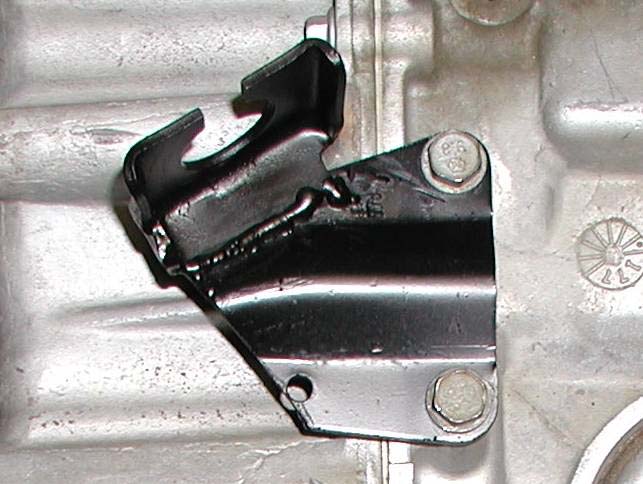
I wanted the bracket to be at a 90 degree angle to the arm in
neutral gear. I ended up using part of the TH125 and part of the
4T60E bracket welded together to make my new bracket. In the
picture, the part bolted to the tranny is the 4T60E piece, and
the part where the cable goes through is the TH125 Fiero piece .
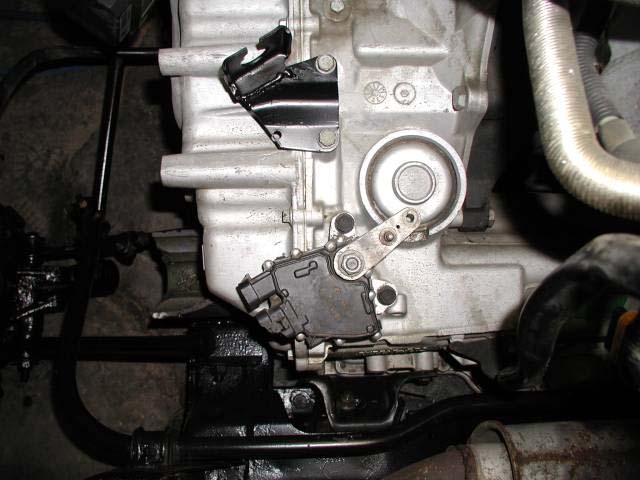
                This is a picture of what the completed setup looks like, put
                the shifter arm into the neutral position ( 2 clicks to the
                right from the left position). set the shifter in the neutral
                position, then adjust the cable length so the eyelet fits on the
                shift lever ball. with this setting the shifter gear detent
                locks will be in the right position for neutral and reverse and
                the shifter will downshift all the way down to 1st gear.
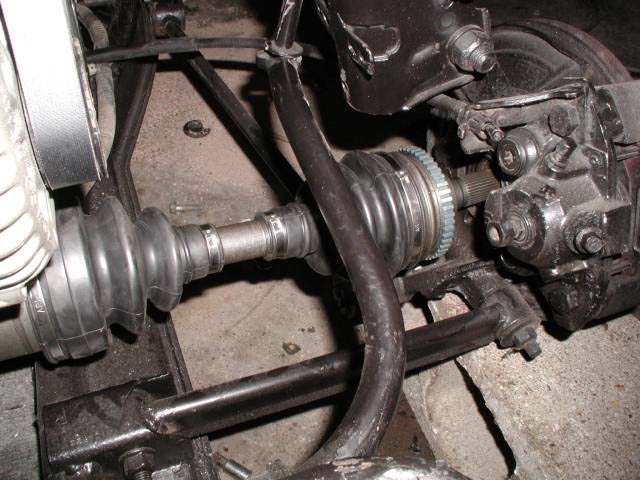
When
I got to the problem with the axles, I saw that people had been
using different combinations, but I noticed it was mentioned
that the passenger side axle was different for the 4t60e
compared to the 4t60. I found that a few people were saying that
axles on both sides of a 94 Beretta w/v6 would be a direct fit
for my transmission so I went to a Car Quest parts store and bought a
set of rebuilt Beretta axles. The axles will probably come with
an abs locator gear. This can be removed with a hammer and
chisel. When I installed the axles I ran into some problems. The
driver's side was a good fit, but when I installed the passenger
side both ends of the axle assembly were correct but the axel
itself was too short. The tripod bearing actually pulled out of
the housing when I tried to install the axle nut. After a little
investigation it appears the passenger side was about 2" too
short. (see picture)
The
first thing that I looked at was the boots. The small end fits
into a groove in the axle, so you can roughly tell how long the
axle is by measuring the distance between the boots. On the
Beretta passenger side axle it was 1.5", so if I add 2" to that
length, I am looking for a axle with about a distance of 3.5".
Now I don't have the resources to go through rebuilt axles to
find the one I need. So what I ended up doing was I still had
the axles from the Monte Carlo donor car and there was a
distance of 3" on the driver's side and 4.5" on the passenger
side between the boots, and the axles had the same diameter of
axle shafts as the Beretta's. I decided the axle with the 3"
distance might work so I disassembled it to remove the shaft.
Now when I disassembled the Beretta shaft I compared it's length
to the Monte's and the Monte's was exactly 2" longer. This
turned out to be just what I needed, so I put the ends of the
Beretta axle assembly onto the Monte Carlo axle shaft, then this
was a perfect fit into the Fiero.
Author:
Mike Kaas |
